Tuesday, January 21, 2014

Week 3- P90X3 Women's Progress Update and Meal Plan

Week 3 of P90X3 is FINISHED!!  YAHOOOOO!

www.HealthyFitFocused.com, P90X3
I couldn't be more happy that this week 3 is over.  It was the same workouts as the first 2 weeks:

    www.HealthyFitFocused.com, P90X3
  • Total Synergistics
  • Agility X
  • X3 Yoga
  • The Challenge
  • CVX
  • The Warrior
  • Rest or Dynamix
So I didn't have any problem with these workouts, I am getting used to the routines and still enjoying them, I'm starting to have my favorites, and I'll get into that in a minute.  But it was an especially tough week for me.  

I woke up Wednesday morning not feeling well.  I had a headache and my stomach was a bit nauseated (not normal for me).  I knew it was X3 Yoga and not jumping around at all, so I decided to take a stab at it anyway even though I wasn't feeling 100%.  Now, this is not a normal thing for me.  I used to be the type of person that would look for any excuse to NOT workout.  But I have had that pendulum swing where I enjoy it!!  However, I've got to be honest with you…the ONLY reason, and I mean ONLY reason I went ahead and worked out on this Wednesday morning is because as I read through the fitness guide I noticed that it said, "if you miss a workout, you need to make that one up as well as the one you are supposed to do the next time you start working out again."  That's all it took…I didn't want to do a double day!  Isn't if funny what makes us do something?  So that's why I pushed through even though I was feeling sick.

www.HealthyFitFocused.com, P90X3So, unfortunately, as the day went on I was fearing I was getting the flu.  So, Thursday and Friday I DID take the day off from working out and rested and got well again.  Saturday, I was back at it but had 2 workouts to make up.  So on Saturday, I completed The Challenge and CVX.  I think those 2 are my 2 favorite workouts.  I can't believe that I'm saying that one of my favorite workouts is push-ups and pull-ups only, but I KNOW I am getting stronger through it and I love that feeling…and because it IS a challenge!!  CVX is just plain FUN!!

So on Sunday, I was completely sore from The Challenge and couldn't make up my Saturday workout, The Warrior so I did that on Monday (today) instead.

All in all, I know I'm getting stronger.  I am doing more push-ups on my feet rather than my knees every single time.  I'm able to do some pull-ups with the P90X Pull-Up Assist (this is totally awesome). My ultimate goal is to be able to just do ONE pull up completely by myself with no assist!!
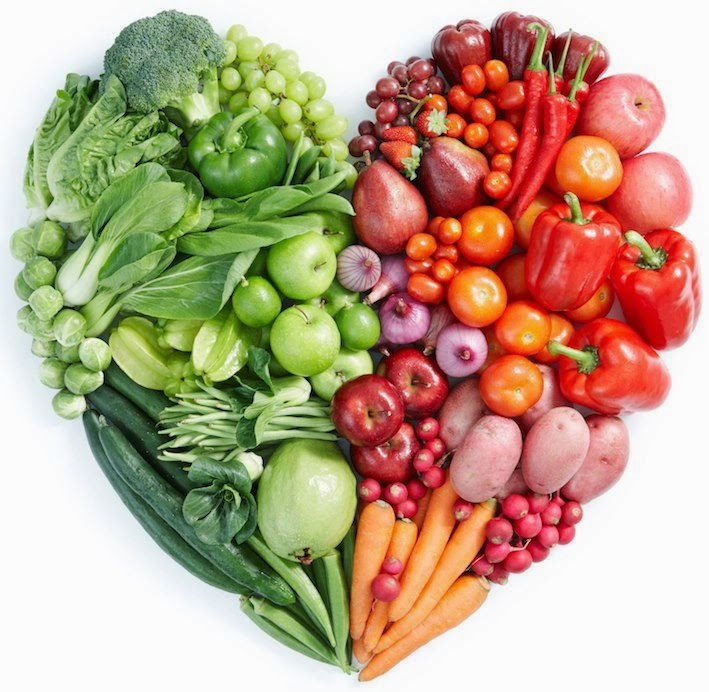
www.HealthyFitFocused.com, P90X3, healthy clean eatingI am not getting the results as quickly as I thought I would, although I KNOW I am getting stronger and have better balance.  As I am assessing my last 3 weeks, I've been totally consistent on my workouts, however, even though I have had a meal plan, I have added extra little snacks or larger portions than I needed.  So this week's focus is following my meal plan to the T with no added picking!!  (Who can relate to the picking??)

Remember…Abs are made in the KITCHEN!  It is so true…and I know it, but, just like everyone else, I get lazy with that too.  I am a work in progress and just need some tweaking along the way!
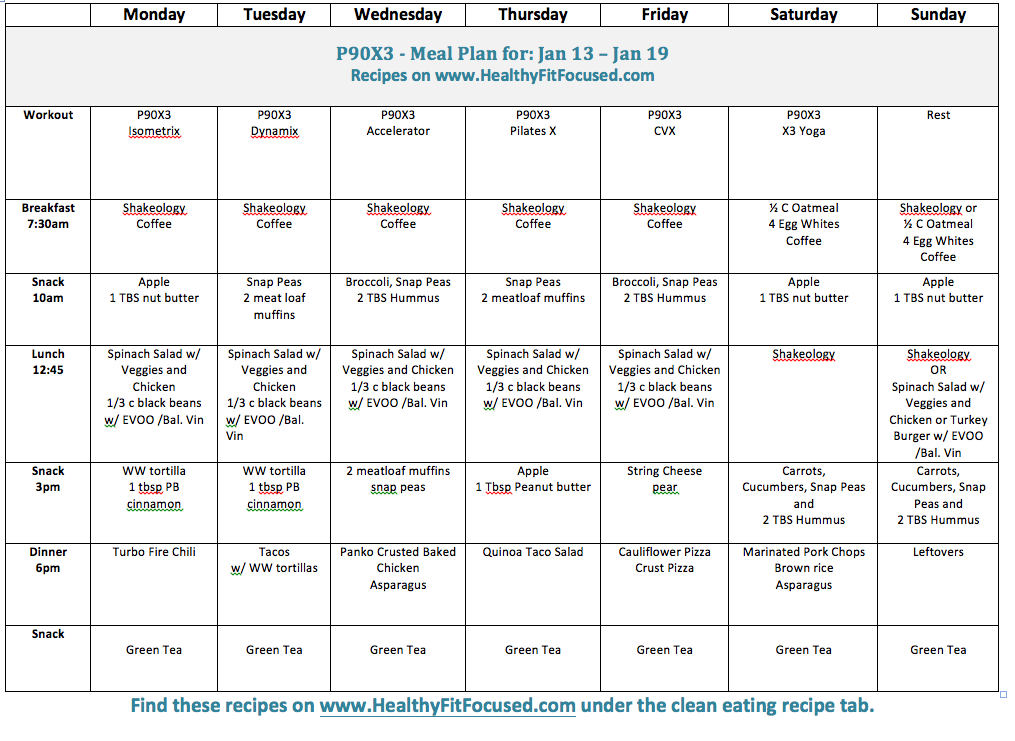
www.HealthyFitFocused.com, Clean Eating Meal Plan
Meal Plan for this week
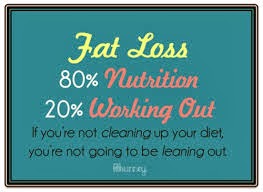
Abs are made in the kitchen, 80% nutrition 20% Fitness
Nutrition is 80% of your RESULTS!!!

I will say, that one thing that has tremendously helped me these last 3 weeks, is the P90X3 Exclusive Challenge Group (accountability group) that I've been participating in.  Even as a Beachbody Coach, it's good to be a part of the challenge group too!  I have had the accountability and the support through my group that helps me along the way.  I know that I will check in each night with them and rate myself and my day and how I've done that day on nutrition, workout and if I had my Shakeology!  It keeps me going in the right direction to know that I have to answer to someone.

If you would like to have that added support and accountability throughout your health and fitness journey I would love for you to be a part of my next Challenge Group starting February 3rd.  

www.HealthyFitFocused.com, Fitness Challenge Group
February 3rd Fitness Challenge Group

- 60 days
- closed online support group
- motivation
- clean eating
- meal planning
- workouts
- one-on-one help from me on how to set goals, beat goals and amaze yourself!!

Take the steps for YOURSELF TODAY to get healthy!  There are 2 amazing sales right now for the month of January.  The HOTTEST home fitness program right now, T25 Challenge Pack is on SALE as well as P90X3 Challenge Pack is on sale again for this month!!

Don't miss out…this pack is exactly what you need to get started in my February 3rd fitness challenge group!  On sale for $180 and you get the fitness program PLUS on month of Shakeology for that price, plus more.  Go HERE to see everything included.

Shakeology, the Healthiest Meal of the Day, www.HealthyFitFocused.com

If you are interested in this group…please fill out my Challenge Group Application.  


HTML Forms powered by Wufoo

Monday, January 20, 2014

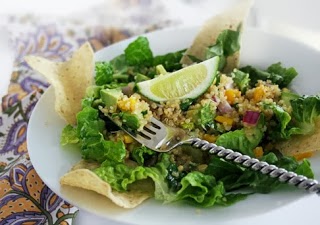
Mexican Quinoa Tacos or Taco Salad

Tacos and anything Mexican are total winners in my house!  I love Mexican food and anything with guacamole (or GRacamole as my nephew called it!).  My kids would literally eat tacos every single night of the week if I let them.  So, sometimes it's important to mix it up a bit, but still give them a little taste of what they like!!  This can be served in tortillas or as a salad!  It's also a great vegetarian meal!

(I got this recipe from Melanie Mitro…thanks!)

1 cup quinoa cooked in 2 cups of water.  Fluff the cooked quinoa with a fork and scoop into a bow.

Mexican quinoa tacos or taco salad, www.HealthyFitFocused.com
Picture courtesy of Melanie Mitro


Ingredients:

  • Extra virgin olive oil, as needed
  • 2 limes juiced
  • Sea Salt (to taste)
  • 2-3 tbsp fresh chopped cilantro
  • 1/2 red or purple onion, diced fine
  • 1 small yellow bell pepper, cored, seeded, diced fine
  • 1 cup roasted corn kernels (I use frozen and put them in a dry skillet to brown a bit)
  • 1 large head of crisp romaine lettuce, dried, sliced crosswise
  • Gluten-free tortilla chips
  • 1 large avocado, pitted, peeled, diced
  • Black beans drained and rinsed
  • 1 large tomato diced
  • (optional, tortillas for tacos instead of salad)

Drizzle the cooked quinoa with EVOO and toss to coat.  Squeeze the fresh lime juice, season with sea salt (to taste), toss to coat.
Add in fresh cilantro, onion, yellow peppers, black beans, tomato, and roasted corn.  Stir all ingredients together.
Line plates or salad bowls with lettuce, spoon quinoa salad on center of the lettuce (if you want to use tortillas place down center of tortillas for tacos).  Add the avocado to each salad plus a few tortilla chips to the salad too!

You can also add salsa or cheese to this if you'd like!

Sunday, January 19, 2014

Panko Crusted Baked Chicken Fingers

I used to make these baked chicken fingers all the time.  However, even though they were "baked" with my old recipe…they were still loaded with butter!  So…it wasn't really that healthy, but they were always such a great hit with my family!!  I finally found some that were healthy and I didn't mind serving them to my family!  Thanks to the TurboFire nutrition guide (and Melanie Mitro) for this recipe…can't wait to try it out this week!! I know it will be a winner in my family!  These are also great things to make lots of and freeze them (before they are cooked) to have for a quick already prepared meal!  I'm all about ease in my house!!

Ingredients:

Panko Crusted Baked Chicken Fingers - www.HealthyFitFocused.com
Panko Crusted Baked Chicken Finger Ingredients 
  • 8 - 5 oz boneless, skinless chicken breasts 
  • 3/4 cup panko (whole  wheat panko bread crumbs)
  • 1/4 cup Dijon Mustard (may sub with spicy Asian mustard)
  • 1/2 cup nonfat plain yogurt
  • 2 Tbsp sesame oil (may sub with peanut oil)
  • 3 garlic cloves
  • 1-1/2 tbsp dried parsley


Directions:

Rinse and pat dry, chicken breast and set aside.  In a large bowl, mix mustard, crushed garlic, yogurt, and sesame oil.  In separate bowl, mix parsley with panko.  Dip chicken into mustard mixture and then roll it in breadcrumbs.  Place on a cookie sheet sprayed with nonstick spray and bake at 475 degrees for 20 minutes, or until coating is golden brown and chicken is no longer pink.  Serve with Dijon sauce or marinara sauce.

NUTRITION INFORMATION PER SERVING
Calories:  231, Protein 31g, Carbs 9g, Total fat 7g, Fiber .5g

Dijon Sauce
Panko Crusted Baked Chicken Fingers - www.HealthyFitFocused.com

  • 1/4 cup Dijon Mustard
  • 1/4 cup nonfat plain yogurt
  • 1 tsp sesame oil
  • 1 tsp low sodium soy sauce


NUTRITION INFORMATION PER SERVING
Calories:  17 protein, .5 carbs, 1g total fat, Fiber 0g

Thursday, January 16, 2014

Cauliflower Pizza Crust

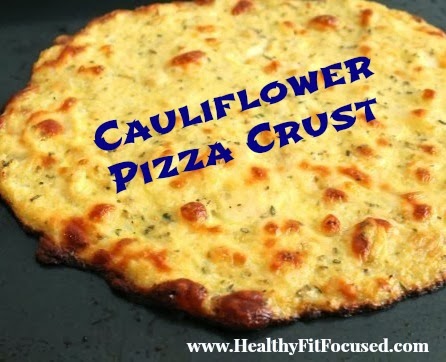
I love pizza, and I've tried to steer clear of it.  But, let's face it…it's a comfort food and it's hard to avoid sometimes.  Well…I've been seeing lots of posts about Cauliflower Pizza Crust.  I'll be honest, I haven't tried it YET.  But I'll be trying is very soon, like on my meal plan for next week!  The great thing about it, is that the crust is now turned into a veggie…then you can top it with all kinds of veggies and low-fat cheese!  Made to perfection!!

Cauliflower Pizza Crust, www.HealthyFitFocused.com
Cauliflower Pizza Crust
So…here it is…

Ingredients
  • 1 head cauliflower, washed, trimmed and completely dried
  • 1 medium onion, finely diced
  • 2 cups shredded low-fat mozzarella cheese 
  • 2 eggs beaten
  • 1 clove garlic, minced
  • 2 tbsp dried oregano
  • 1 tbsp dried parsley
  • olive oil spray
  • pizza sauce of your choice 
  • toppings of your choice

Directions:

 First you'll "rice" your cauliflower.  Take a head of cauliflower and break up the florets into the food processor and pulse down until you get something that resembles course grain.  Do not over process.  If you don't have a food processor then you can grate the whole head of cauliflower with a cheese grater.  

Place the riced cauliflower into a microwave save bowl and heat for 8 minutes.  Don't add water as there's enough naturally to cook itself.  

Making the Pizza Crust:


  1. Preheat oven to 450 degrees.  Spray cookie sheet with non-stick cooking spray.  
  2. In a medium bowl, stir together cauliflower, egg and mozzarella.  Add oregano, garlic, and parsley, stir.  Transfer to the cooking sheet and using your hands pat out into a round or long pizza crust.  Optional: Brush olive oil over top of mixture to help with browning.  
  3. Bake at 450 degrees for 15 minutes.
  4. Remove from oven.
  5. Add sauce, toppings and cheese to the crust.  Place under broiler at high heat just until cheese is melted (approximately 3-4 minutes).
**Note:  Toppings need to be precooked since you are only broiling for a few minutes.

Suggestions for toppings:
Cauliflower Pizza Crust, www.HealthyFitFocused.com
Yummmy Pizza Toppings
  • Onions
  • Mushrooms 
  • Tomatoes
  • Olives
  • Bell Peppers
  • Zucchini
  • Shredded Chicken
  • Goat Cheese
  • Avocado
  • Artichoke Hearts
  • Pineapple
  • Spinach

Be creative…the sky's the limit!